You don’t need a sourdough starter that requires more attention than a newborn, nor do you need a kitchen full of fancy French gadgets to get this right. Most people think that learning how to make hot cross buns is all about technical precision and expensive spices, but after forty years of watching people rush through things, I’ve found the opposite is true. The secret isn’t in a complex recipe; it’s in the timing of the rise and not being afraid to get a bit of flour on your waistcoat. I remember trying to follow one of those high-speed cooking shows back in the early nineties—the one with the bright lights and the shouting—and I ended up with buns as hard as the flint stones in a dry stone wall.
I’m not here to give you a lecture or a list of ingredients you can’t find at the local Co-op. Instead, I’m going to show you the honest, no-nonsense way to do it, based on decades of trial and error in my own kitchen. I’ll tell you exactly when the dough has had enough time to rest and how to avoid that dreaded, heavy texture. We’ll stick to the basics that actually work, so you can serve something decent to your neighbours without any unnecessary fuss.
Table of Contents
- Recipe Instructions
- Selecting Spiced Yeast Dough Ingredients That Actually Matter
- Traditional Easter Bun Recipe Why Patience Beats a Quick Shop Bought Fix
- A few bits of advice from a kitchen that’s seen its fair share of failed bakes
- A few final thoughts before you get the oven on
- ## The secret is in the waiting
- A final word on the buns
- Frequently Asked Questions
Recipe Instructions
Step 1
First, you’ll need to get your liquid ingredients in order. Warm up about 250ml of milk—not hot, mind you, or you’ll kill the yeast—and stir in a teaspoon of sugar and a packet of fast-action dried yeast. Let it sit for about ten minutes until it looks slightly frothy on top. If it doesn’t bubble, your yeast is likely past its prime, and you’ll be wasting your time with a heavy lump of dough.
Step 2
In a large bowl, mix together 500g of strong white bread flour with a pinch of salt. Make a well in the middle and pour in your yeast mixture, along with about 100g of melted butter and a handful of sultanas. Use a wooden spoon to bring it all together until it forms a clumpy mass. It won’t look pretty at this stage, but don’t fret; it’s just the beginning.
Step 3
Now comes the bit that requires a bit of elbow grease. Turn the dough out onto a lightly floured surface and knead it for at least ten minutes. I usually put on the wireless and work it until the dough feels smooth and elastic, much like a well-cured piece of leather. If it’s sticking to your hands like wet mortar, add a tiny dusting of flour, but don’t go overboard or you’ll end up with buns as hard as the flint in a dry stone wall.
Step 4
Place your dough in a lightly greased bowl, cover it with a clean tea towel, and leave it in a warm, draught-free spot—the pantry is usually my go-to—for about an hour. You want it to double in size. While you’re waiting, you can prep your baking tray with parchment paper. I’ve seen many a novice skip this and end up scrubbing burnt sugar off a tin for twenty minutes afterward.
Step 5
Once the dough has risen, punch it down to get the air out and divide it into twelve equal pieces. I find it easiest to use a small kitchen scale, but if you don’t have one, just eyeball them so they are roughly the size of a large cricket ball. Roll them into tight, smooth balls and place them on your tray, leaving plenty of space between them because they need room to expand.
Step 6
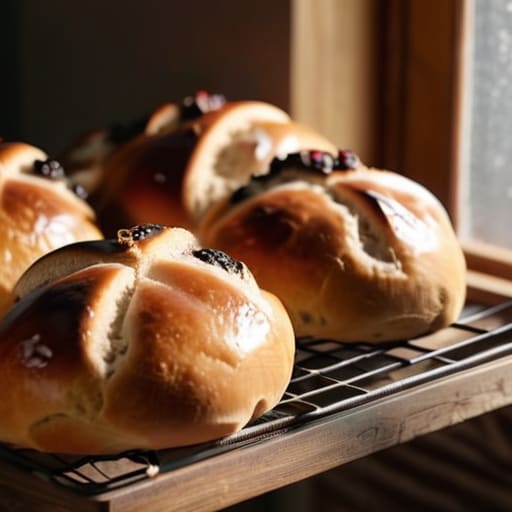
Let them rise again for another thirty minutes. While they do that, mix a little flour with water to make a thick paste for the crosses. Once the buns have puffed up, pipe the paste across the tops in straight lines. Pop them into a preheated oven at 200°C for about 12 to 15 minutes. You’re looking for a deep golden colour; if they look pale, they’ll be dry, so keep a close eye on them.
Step 7
As soon as they come out of the oven, brush the tops with a little melted butter. This keeps the crust from getting too tough and gives them that professional sheen. Let them cool on a wire rack, though I’ll be the first to admit that waiting is the hardest part when the smell starts drifting through the house.
Selecting Spiced Yeast Dough Ingredients That Actually Matter
Now, if you’re looking to get the most out of your spiced yeast dough ingredients, don’t go thinking any supermarket brand will do. I’ve spent many a morning at the local bakery in Salisbury, and the difference is always in the weight of the spices. You want nutmeg and cinnamon that actually smell of something, not those dusty tins that have been sitting on a shelf since the Queen’s Jubilee. If you want a proper traditional easter bun recipe, use real dried currants or even a bit of candied peel. I’ve found that soaking the fruit in a splash of warm water for twenty minutes before it hits the flour prevents the dough from drying out—a small trick, but one that makes a world of difference to the texture.
When it comes to the rise, remember that patience is a virtue most of us lost somewhere in the nineties. For better yeast dough fermentation tips, keep your kitchen warm but avoid the radiator; a drafty corner near the pantry is often better than a blast of artificial heat. If you’re feeling particularly ambitious, you can learn how to make cross paste at home using a simple flour and water slurry, rather than relying on that sticky, store-bought stuff. It holds the shape much better once they’ve puffed up in the oven.
Traditional Easter Bun Recipe Why Patience Beats a Quick Shop Bought Fix
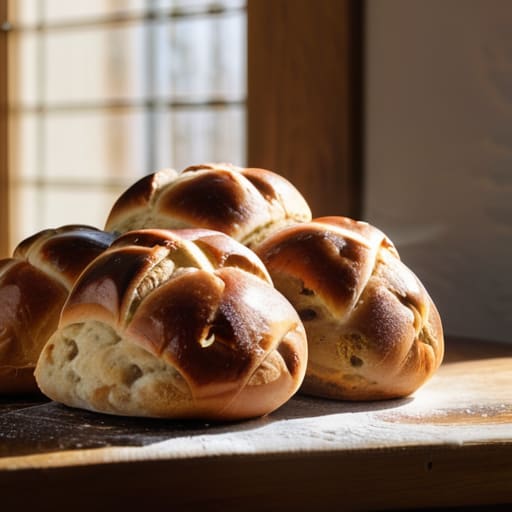
I walked past the bakery in the village square yesterday—the one in the old maltings building, dating back to about 1890—and saw them stacking those plastic-wrapped, supermarket-style buns. They’re fine if you’re in a rush, but they lack the soul of a proper traditional easter bun recipe. When you bake them yourself, you aren’t just following a list of instructions; you are managing a living thing. The secret lies in the yeast dough fermentation tips I’ve gathered over the years: don’t rush the rise. If the kitchen is cold, like it was during that frost last February, give the dough an extra hour in a warm corner near the oven.
There is also the matter of the topping. Most people buy the pre-made stuff, but learning how to make cross paste at home using just a bit of flour and water makes a world of difference to the texture. It stays crisp rather than turning into a sticky, sugary smear. Whether you prefer yours heavy with currants or light with citrus peel, these homemade fruit buns are about the ritual of it. It’s the sort of thing that makes the Sunday morning service feel a little more complete.
A few bits of advice from a kitchen that’s seen its fair share of failed bakes
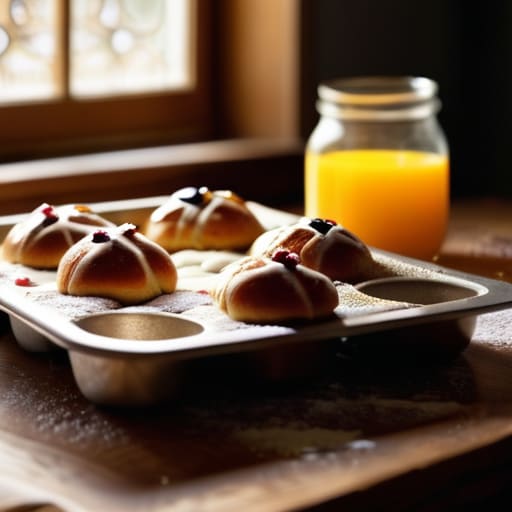
- Don’t go skimping on the dried fruit; I once tried to save a few pence by using a handful of raisins, and the buns ended up as dry as a summer’s day in the Chilterns. Use sultanas or even chopped apricots if you want a bit of real moisture.
- Mind your water temperature like you’re checking the damp in a Victorian cellar. If it’s too hot, you’ll kill the yeast straight off, and you’ll be left with nothing but a heavy, useless lump of flour. It should feel lukewarm, like a bath that’s been sitting for five minutes.
- Give the dough enough time to rise in a draught-free spot. I know we’re all in a hurry to get to the garden or the pub, but rushing the proofing is a recipe for a bun that’s as dense as a flint wall.
- When you’re adding the spices, don’t just sprinkle them on top. Mix the cinnamon and nutmeg into the flour itself so the flavour is worked right through to the centre, rather than just sitting on the crust.
- If you want that professional sheen without the supermarket chemicals, brush them with a bit of melted butter the second they come out of the oven. It keeps the crust soft and gives them that honest, golden look.
A few final thoughts before you get the oven on
Don’t rush the rise; if the kitchen is draughty, leave the dough in the oven with just the light on, much like how a good stone wall needs time to settle before it’s useful.
Buy real spices from a shop that knows what they are, because those dusty, pre-mixed jars from the supermarket won’t give you the depth a proper bun deserves.
Remember that a slightly uneven bun is better than a perfect one that tastes of nothing—it’s the character of the bake that counts when you’re sitting down with a cup of tea.
## The secret is in the waiting
I’ve spent thirty years looking at the foundations of houses, and I’ve learned that nothing holds up if you rush the base; the same is true for a proper bun—if you don’t give that dough the time it needs to rise properly in a warm kitchen, you’re just eating expensive, spiced bread.
Gordon Ellery
A final word on the buns
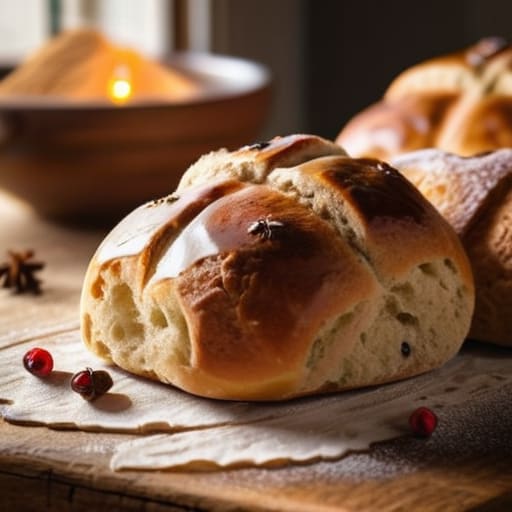
If you take anything away from this, let it be that a proper bun is won or lost in the details. It is the quality of the yeast you choose, the warmth of the room where the dough sits, and the refusal to rush the rise when the clock says you should be finished. I have spent thirty years looking at the structural integrity of flint and brick, and I can tell you that patience is the foundation of anything worth building, whether it is a dry stone wall or a batch of spiced dough. Don’t skimp on the spices, and for heaven’s sake, don’t let the dough get cold before it hits the oven.
At the end of the day, these buns are about more than just filling a gap in the afternoon tea. They are about the small, quiet ritual of making something with your own hands that smells exactly like home. There is a particular kind of satisfaction in pulling a tray of golden, fragrant buns from the oven, knowing you didn’t take the easy way out. It is about keeping the tradition alive in our own kitchens, one batch at a time. So, clear the flour off the table, put the kettle on, and enjoy what you have made. You’ve earned it.
Frequently Asked Questions
My kitchen is a bit on the chilly side; will the dough still rise properly if I don't have a warm spot to leave it?
I’ve spent many a morning in my own kitchen—which, much like the old stone cottages near Lower Slaughter, holds the chill quite stubbornly—wondering the same thing. If your house is cold, the yeast simply goes to sleep. Don’t panic; just don’t leave it on the counter. I usually pop my bowl inside the oven with nothing turned on, perhaps with the pilot light or a single bulb lit. It creates a gentle, steady warmth that does the job perfectly.
I’ve seen some buns with fruit stuck right on the surface and others where it's all tucked inside—is there a trick to keeping the raisins from sinking?
It’s a common frustration, and I’ve seen many a disappointing bun where the fruit has all migrated to the bottom. The trick is twofold: first, ensure your raisins aren’t bone-dry; a quick soak in warm water before adding them helps them bond to the dough. Second, don’t over-knead once the fruit is in. If you work the dough too much after adding them, you’ll break down the structure that holds them up.
If I’ve used dried fruit instead of fresh, do I need to soak them in something first to stop them from being chewy?
If you’re using dried fruit, don’t just toss them straight into the dough. They’ll suck the moisture right out of your buns, leaving you with something more akin to a hockey puck than a soft brioche. I always soak mine in warm milk or a bit of orange juice for about twenty minutes before mixing. Drain them well, of course, but that extra bit of hydration makes all the difference.