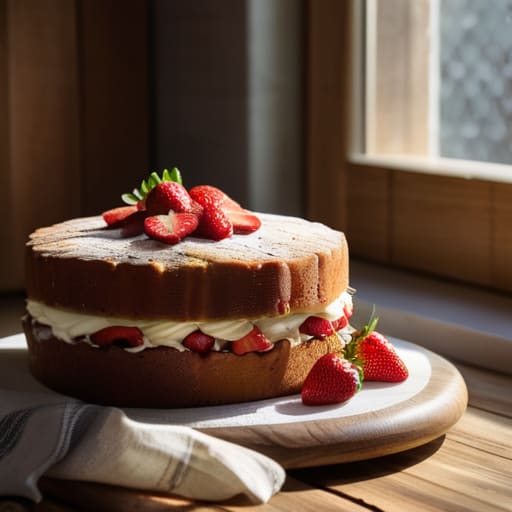
You don’t need a fancy electric mixer or a degree in culinary arts to master this; in fact, most of those complicated recipes you see online are just making things harder than they need to be. I remember my wife, Margaret, used to insist that if you didn’t have the exact right temperature for the eggs, the whole thing would collapse—much like a poorly laid foundation on a Victorian terrace. But after years of trial and error in my own kitchen, I’ve learned that knowing how to bake a victoria sponge is more about understanding your ingredients than following a list of expensive gadgets.
I’m not here to give you a lecture or a list of “chef’s secrets” that involve truffle oil and gold leaf. Instead, I’m going to give you a no-nonsense guide based on what actually happens when you’re standing in a kitchen on a Tuesday afternoon. I’ll tell you exactly where people usually trip up—like using butter that’s gone a bit too soft—and how to ensure your sponge is light enough to lift a spirit. It’s about reliable results every single time.
Table of Contents
- Recipe Instructions
- Choosing Between All in One Method vs Creaming Method
- The Baking Temperature for Sponge Cakes That Matters
- Five things I’ve learned from a lifetime of kitchen mishaps
- A few final thoughts before you preheat the oven
- ## A bit of common sense in the kitchen
- A Final Word on the Victoria Sponge
- Frequently Asked Questions
Recipe Details
Ingredients
- 225g unsalted butter, softened
- 225g caster sugar
- 4 large eggs
- 225g self-raising flour
- 1 tsp baking powder
- 2 tbsp milk
- 150g strawberry jam
- 150ml double cream
Recipe Instructions
Step 1
First things first, get your oven preheated to 180°C (or 160°C if you’re using a fan oven). I’ve seen too many people pull a sponge out only to find it’s still doughy in the middle because the oven hadn’t actually reached temperature. While that’s warming up, grease two 20cm sandwich tins with a bit of butter; I prefer using baking parchment at the bottom, as it stops the sticking much better than just butter alone.
Step 2
Now, you’ll need your butter and sugar to be at the same temperature. If you try to cream together cold butter and caster sugar, you’ll end up with a grainy, uneven mess that won’t rise properly. Beat them together in a large bowl until the mixture looks pale and unbelievably fluffy. It takes a few minutes of elbow grease, but it is the most important part of the whole process.
Step 3
Crack in your eggs—three large ones, ideally—and add a teaspoon of vanilla extract. Add the eggs one at a time, beating well after each addition. If the mixture looks like it’s starting to curdle, which happens more often than you’d think, just add a spoonful of your flour to steady it before moving on.
Step 4
Gently fold in your flour. I’m talking about 225g of self-raising flour, sifted to get rid of any lumps. Do not, under any circumstances, use a whisk or a vigorous stirring motion here; you’ll knock the air right out of it. Use a metal spoon to fold it in gently until you can’t see any more white streaks, then stop.
Step 5
Divide the batter equally between your two prepared tins. Give them a little tap on the worktop to settle the mixture and pop them into the middle of the oven. Leave them be for about 20 to 25 minutes. You’ll know they are done when they are golden brown and they spring back when touched. If you open the door too early, they’ll sink, and nobody wants a sad, flat sponge.
Step 6
Once they are out, let them sit in the tins for five minutes before turning them out onto a wire rack to cool completely. I’ve learned the hard way that if you try to sandwich a cake while it’s even slightly warm, the jam will just run straight off the sides and onto your plate. Wait until they are stone cold before you even think about the icing sugar.
Choosing Between All in One Method vs Creaming Method
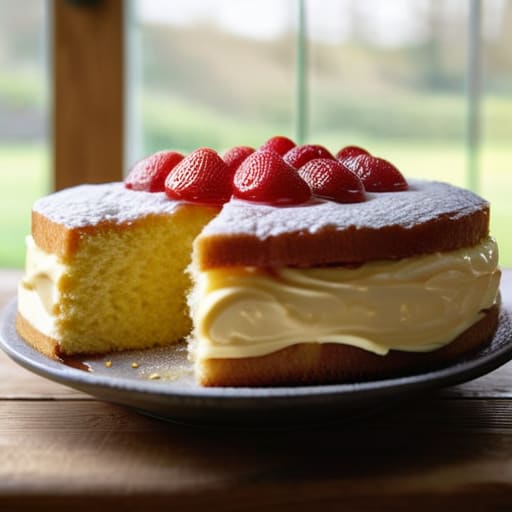
Now, you’ll find all sorts of advice in those glossy magazines, but when it comes to the all in one method vs creaming method, there’s no single right answer—only what suits your morning. I remember my mother always insisted on the creaming method; she’d spend ten minutes beating the butter and sugar until it was pale and fluffy. It takes more patience, certainly, but if you want that perfect sponge cake texture that feels light enough to float, that extra effort is worth it. The all-in-one approach is much faster, which is fine if you’re in a rush before the postman arrives, but you might find the result a bit denser.
If your cakes are coming out looking a bit sad, you might be troubleshooting flat cakes caused by over-mixing or a temperamental oven. I’ve seen plenty of a good batter ruined by a door being opened too early. I always suggest checking your baking temperature for sponge cakes with an oven thermometer; those old dials can be as unreliable as the Number 42 bus. Once you’ve mastered the bake, you can play around with different victoria sandwich filling ideas, though you can’t beat the standard jam and cream for a proper afternoon tea.
The Baking Temperature for Sponge Cakes That Matters
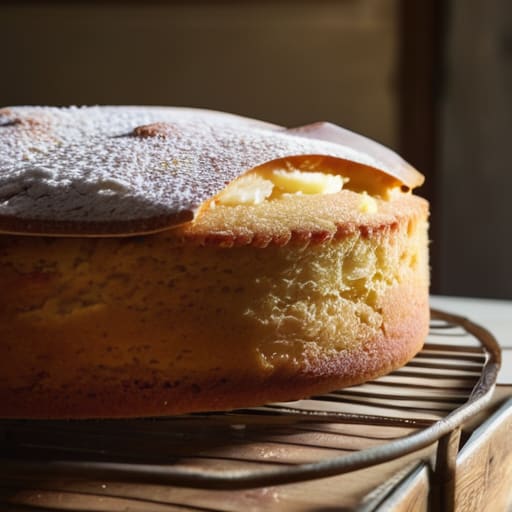
Now, I’ve spent enough time in draughty kitchens to know that your oven is often a liar. You might set it to 180°C, but if that heating element is as old as the stone wall I was attempting to mend last Saturday, the actual heat inside could be anything else. Getting the baking temperature for sponge cakes right is the difference between a proud, golden dome and a sad, sunken crater. If you find yourself troubleshooting flat cakes after they’ve come out, don’t immediately blame your flour or your eggs; more often than not, it’s because the oven was a bit too sluggish to give the batter that initial lift.
I always suggest giving your oven a good preheat for at least twenty minutes, even if the little light says it’s ready. It takes a while for the heat to penetrate the very back of the cavity, much like how it takes a while for a new tenant to settle into an old cottage. If you’re aiming for that perfect sponge cake texture, you want a steady, reliable warmth that encourages a gentle rise rather than a violent burst. It’s a bit like surveying a site; you can’t rush the foundation if you want the structure to last.
Five things I’ve learned from a lifetime of kitchen mishaps
- Don’t go skimping on the jam. I once saw a neighbour try to save money by using a thin, runny strawberry preserve, and it turned the whole thing into a sliding mess. Use a proper, thick conserve; it needs to sit on that sponge like a solid foundation sits on a well-laid footing.
- Sift your flour. It sounds like a bit of a faff when you’re busy, but if you don’t, you’ll end up with little white lumps of dry powder that no amount of eating can fix. I’ve seen enough poorly finished masonry to know that what you put in at the start determines how it looks at the end.
- Watch your eggs. If you’re using eggs straight from the fridge, you’re asking for trouble. They won’t emulsify properly with the butter, and you’ll end up with a heavy, greasy sponge rather than the light, springy one we’re after. Leave them out on the counter for an hour; it’s a small price to pay.
- Let the cakes cool completely before you even think about slicing them. I’ve been tempted to rush it myself, especially when the kettle is on, but a warm sponge will simply crumble under the weight of the cream. It needs to be as stable as a dry stone wall before you start building on top of it.
- Use a scale, not a measuring jug. I know, it feels a bit old-fashioned, but flour is far too fickle to be measured by volume. A few extra grams can be the difference between a perfect bake and something that feels more like a biscuit than a cake. Accuracy matters, whether you’re valuing a cottage or weighing out flour.
A few final thoughts before you preheat the oven
Don’t go skimping on the butter; if it isn’t soft enough to dent with a thumb, your sponge will be as heavy as a damp foundation slab.
Watch the oven like a hawk, because a cake that’s five minutes too long in the heat is a cake that’s lost its soul.
Remember that a Victoria Sponge is meant to be simple, so don’t go overcomplicating it with fancy decorations that hide a poor bake.
## A bit of common sense in the kitchen
I’ve spent thirty years looking at the structural integrity of flint and brick, and I can tell you a Victoria Sponge is no different; if you don’t get the foundation of your butter and sugar right at the start, no amount of jam or cream in the middle is going to save it from collapsing.
Gordon Ellery
A Final Word on the Victoria Sponge
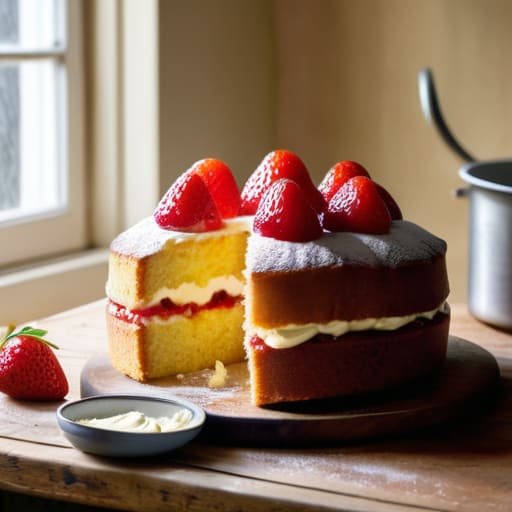
If you have followed the steps, you should be standing in a kitchen that smells significantly better than it did twenty minutes ago. Just remember the fundamentals we have discussed: whether you choose to cream your butter or use the all-in-one method, the key is to avoid the temptation of over-mixing once the flour goes in. Keep an eye on that oven temperature, too; a sponge that is rushed at too high a heat will crown in the middle and crack, much like the old lintel on the Smith cottage down the lane. It is about patience and precision, ensuring the crumb is light enough to hold the jam without collapsing under the weight of the cream.
At the end of the day, a Victoria Sponge isn’t meant to be a museum piece or something you’re afraid to touch. It is a working cake, designed for a tin of tea and a bit of good company. I have spent forty years looking at the structural integrity of buildings, but I have learned that the true foundation of a community isn’t found in the bricks and mortar of a house, but in the small moments shared over a kitchen table. So, don’t fret if your edges aren’t perfectly straight. Slice it up, put the kettle on, and enjoy the result of your own hard work.
Frequently Asked Questions
Can I use margarine instead of butter, or will it affect how the sponge rises?
You can use margarine, but I wouldn’t recommend it if you want a proper sponge. Margarine has a much higher water content than butter, and that’s where your trouble starts. It can make the batter a bit too heavy, which means the cake won’t rise quite as loftily as it should. If you’re in a pinch, it’ll bake, but for a reliable, airy result, stick to real butter.
How do I know if the cake is truly done in the middle without poking too many holes in it?
You don’t need to go stabbing at it like you’re surveying a site for foundations. If you poke too many holes, you’ll lose the air and end up with a heavy sponge. Instead, give the tin a very gentle shake near the oven door. If the centre wobbles like jelly, it’s not ready. If it stays firm, you’re on the right track. A single skewer through the middle is plenty; if it comes out clean, it’s done.
What is the best way to store the sponge if I'm not planning to eat it the same day?
If you aren’t tucking in immediately, don’t leave it sitting out on the counter like a forgotten garden ornament; it’ll go dry before you know it. Once the layers are completely cool, wrap them tightly in a bit of cling film. If you’ve already filled it with jam and cream, it’s best kept in an airtight container in the fridge. Just remember to bring it back to room temperature before serving, or you’ll lose that lovely texture.