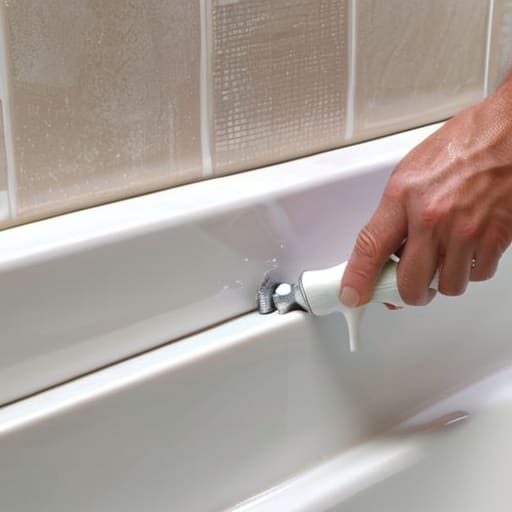
I was kneeling on a cold, damp floor in a Victorian terrace near Salisbury last Tuesday, staring at a hairline crack in some perished silicone, when it hit me: most people think a bit of sealant is just about making the bathroom look tidy. They couldn’t be more wrong. If you don’t understand how to seal a bath properly, you aren’t just dealing with a bit of mould; you are inviting a slow, silent rot into your floorboards that will cost you thousands once the joists start to go. I’ve seen enough damp-stricken properties during my thirty years as a surveyor to know that a failing seal is often the first warning sign of a much larger structural headache.
In this guide, I’m going to skip the fancy jargon and tell you exactly how to do it right the first time. I’ll walk you through choosing the correct grade of silicone, clearing out the old, crusty bits without scratching your enamel, and—most importantly—how to get that perfect, smooth bead that actually stays put. No expensive gadgets required, just a bit of patience and the right method.
Table of Contents
- Step-by-Step Instructions
- Sanitary Silicone vs Acetic Silicone Picking the Right Defender
- Cleaning Surfaces Before Sealing to Ensure It Actually Holds
- Five things I’ve learned the hard way about a tidy bathroom
- Three things to remember before you reach for the sealant gun
- The cost of a bit of laziness
- A final word on the job
- Frequently Asked Questions
Guide Overview
Tools & Supplies
- Caulking gun for applying sealant
- Utility knife for removing old silicone
- Putty knife or scraper for cleaning surfaces
- Microfiber cloth for wiping residue
- Sanitary silicone sealant (anti-mold) 1 tube
- Rubbing alcohol or degreaser for cleaning surface
Step-by-Step Instructions
- 1. Before you even think about reaching for the new tube, you have to get the old, mouldy mess out of the way. I’ve seen too many people try to layer new silicone over the old stuff, and it’s a fool’s errand; the new layer won’t stick and you’ll be back here in six months. Use a sharp Stanley knife or a proper sealant removal tool to carefully slice away the old bead. Be careful not to gouge the enamel of the bath itself—it’s a painful mistake to fix once the damage is done.
- 2. Once the old sealant is gone, you’ll find a layer of grit and old residue left behind. Take a bit of methylated spirits on a clean rag and give the entire gap a thorough wipe. You need that surface to be bone dry and completely free of any soap scum or oils. If there’s even a hint of moisture lurking in the corner, the new seal will simply peel away like a cheap sticker.
- 3. Now, pick your sealant. Don’t just grab the cheapest tub from the supermarket; you want a high-quality sanitary silicone that actually contains fungicide. If you live in one of those older cottages with a bit of a damp problem, you’ll want something that can stand up to the humidity. I usually keep a tube of the good stuff in my shed, specifically because it actually stays clear for more than a year.
- 4. Cut the nozzle of your sealant tube at a 45-degree angle. Don’t make the hole too big—it’s much easier to add more than it is to scrape away a massive, ugly blob. Hold the tube at a steady angle and squeeze with a constant, even pressure as you move along the joint. You aren’t trying to paint a masterpiece here; you’re just trying to fill the gap completely and smoothly.
- 5. This is the part where most people get impatient, but you mustn’t. Once the bead is down, take a spray bottle filled with a bit of water and a tiny drop of washing-up liquid and lightly mist the sealant. Then, take a smoothing tool—or, if you’re like me and don’t want to buy fancy gadgets, a gloved finger—and run it along the bead to press it into the corner. You want a neat, concave line that looks like it belongs there.
- 6. Finally, step away and leave it alone. I know it’s tempting to run a test bath to see if it works, but if you get it wet before it has cured, you’ve wasted your afternoon and your money. Most decent sealants need at least 24 hours to set properly. If you can manage to stay out of the bathroom for a full day, you’ll find the result is well worth the wait.
Sanitary Silicone vs Acetic Silicone Picking the Right Defender
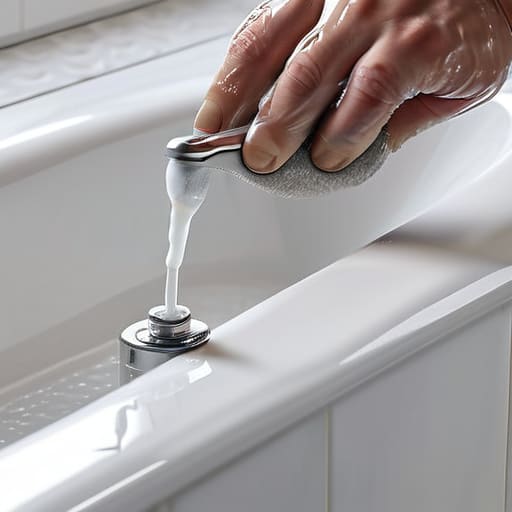
Now, if you wander into any decent DIY shop in Salisbury or Andover, you’ll find yourself staring at a wall of tubes that all look remarkably similar. Don’t let them fool you. The real debate is sanitary silicone vs acetic silicone, and getting this wrong is a quick way to find yourself staring at a mouldy mess in six months’ time. Acetic silicone has that sharp, vinegar-like smell that hits you the moment you crack the seal. It’s fine for a kitchen sink, but for a bathtub, you want something specifically labelled as sanitary. It’s formulated with fungicides to stop that black, fuzzy rot from taking hold in the damp corners.
I’ve seen plenty of well-meaning folks try to save a few pence by using general-purpose sealant, only to be replacing it all over again before the next summer. If you want real bathroom sealant longevity tips, stick to the high-grade sanitary stuff. It’s a bit more expensive, yes, but it’s much better than spending your Saturday afternoon scraping old, crusty residue off a porcelain tub. Just remember: the sealant is only as good as the surface it’s sticking to, so make sure those edges are bone dry.
Cleaning Surfaces Before Sealing to Ensure It Actually Holds
Now, if you skip the cleaning, you might as well be applying the sealant with a paintbrush; it simply won’t stick. I’ve seen many a well-meaning homeowner slap on a fresh bead of silicone, only to have it peeling away like old wallpaper within six months. The culprit is almost always a microscopic layer of soap scum or that lovely, stubborn pink mould that loves to settle in the corners. You need to get that surface absolutely clinical. I usually grab a stiff toothbrush and a bit of methylated spirits to give the joint a proper scrub. If there’s any grease or old residue left behind, you aren’t actually sealing anything; you’re just laying a layer of silicone on top of dirt.
Once you’ve scrubbed it, you must let it dry completely. I’ve spent forty years looking at damp-damaged floorboards in old cottages, and I can tell you that preventing water leaks in bathrooms starts with a bone-dry substrate. Even a tiny bit of moisture trapped under the bead will cause the bond to fail. Use a hairdryer if you’re in a rush, but patience is your best tool here. Think of it as preparing a foundation; if the base isn’t spotless, the rest of your work is nothing more than a temporary fix.
Five things I’ve learned the hard way about a tidy bathroom
- Don’t be stingy with the bead. I’ve seen plenty of DIY jobs where someone tried to save a tube of silicone by stretching it too thin; you’ll end up with a gap that looks like a dry riverbed, and water will find its way right through it.
- Use a smoothing tool or a wet finger, but don’t overdo the sliding. If you keep rubbing the same spot over and over, you actually pull the sealant away from the edge, leaving you with a messy, uneven line that won’t hold its shape.
- Patience is your best tool here. You might be tempted to jump in the shower an hour after finishing, but if you haven’t given that silicone a full twenty-four hours to cure, you’re just asking for the seal to peel off like old wallpaper.
- Check the joints before you start. If you’re sealing over an existing, mouldy mess, you’re just putting a new coat of paint on a rotten fence; you have to get every trace of the old stuff out, or the new layer won’t ever truly bond.
- Watch the slope of the bath. If your tub has shifted slightly over the years—which many built in the late seventies tend to do—you’ll need to ensure your sealant is thick enough to bridge that gap without cracking when someone actually sits in it.
Three things to remember before you reach for the sealant gun
Don’t skimp on the silicone; if you buy the cheap, acetic stuff meant for windows, it’ll peel away from your bath within six months and leave you staring at a mouldy mess.
Preparation is ninety per cent of the job—if you don’t scrub that old residue away and let the area dry out completely, you’re just sealing the damp in, and that’s a recipe for rotten floorboards.
A tidy bead is better than a thick one; it’s much easier to fix a small gap than it is to scrape away a massive, wobbling mountain of silicone that’s gone wrong.
The cost of a bit of laziness
I’ve seen plenty of Victorian terraces in the village where a ten-minute job of stripping old silicone and applying a fresh bead would have saved the owner five thousand pounds in floorboard rot and joist repairs. A bath seal isn’t just about making things look tidy for the guests; it’s the only thing standing between your bathroom and a very expensive structural headache.
Gordon Ellery
A final word on the job
So, once you have scraped away the old, mouldy mess and scrubbed the area until it’s bone dry, you are nearly there. Remember that choosing the right sanitary silicone isn’t just a suggestion; it is the difference between a job that lasts a decade and one that starts peeling by Christmas. Don’t rush the application, and for heaven’s sake, don’t use the cheap stuff from a bargain bin if you can help it. If you’ve cleaned the surface properly and applied a steady bead, you’ve done more than most. It is a small task, but as I’ve seen in many a Victorian terrace around here, a bit of preventative maintenance now saves you from a much more expensive conversation with a structural surveyor later.
At the end of the day, keeping a home in good repair isn’t about having a showroom-perfect house; it’s about the peace of mind that comes with knowing your foundations are dry. There is a certain quiet satisfaction in fixing something with your own two hands, even if it’s just a bit of sealant around a bathtub. It is about looking after what you have, so that the house continues to look after you. A well-maintained home is a sturdy home, and that is something worth the extra hour of kneeling on a damp floor.
Frequently Asked Questions
If I see a bit of black mould behind the old sealant, can I just scrape it out and put new silicone over the top, or is that asking for trouble?
If you try to layer new silicone over old, mouldy bits, you’re essentially building a house on sand. I’ve seen enough damp-rot issues in old cottages to know that mould is a sign of a failed barrier. If you just scrape the surface and patch it, that black rot will stay trapped underneath, feeding on the moisture until the new seal fails too. You have to strip it back completely to the bare tub.
How long do I actually have to wait before I can run a hot bath without the new seal lifting or warping?
Now, don’t be in a hurry to test the waters. I’ve seen plenty of folks rush a job, only to have the silicone pull away from the tiles by Tuesday. Even if it feels dry to the touch after an hour, you really ought to give it a full 24 hours before running a hot bath. That time allows the sealant to cure properly through to the bottom, ensuring it won’t warp when the steam hits.
Is it worth paying a bit extra for a professional-grade sealant, or will the standard stuff from the local DIY shop do the job well enough?
I’ve spent thirty years looking at what happens when things go wrong, and I’ll tell you this: don’t skimp on the tube. The cheap stuff from the big-box stores often has more filler than actual silicone; it looks fine for a month, then it starts shrinking and peeling like a bad sunburn. Spend the extra few pounds on a proper professional-grade sanitary sealant. It’ll stay flexible longer, and frankly, it’s cheaper than replacing a rotted floorboard.